10.24.2017

Pusheen Amigurumi Crochet Pattern & Tutorial: Candy Corn Halloween

Like many people, I love to follow cute characters on Instagram and Pusheen is a long time favorite. This week this picture was in my feed and when I saw it, I fell in love! How freakin' adorable, right!? I just had to try to make my own Candy Corn Pusheen and I decided that if it was a success, I'd share my pattern with you! And here she is!
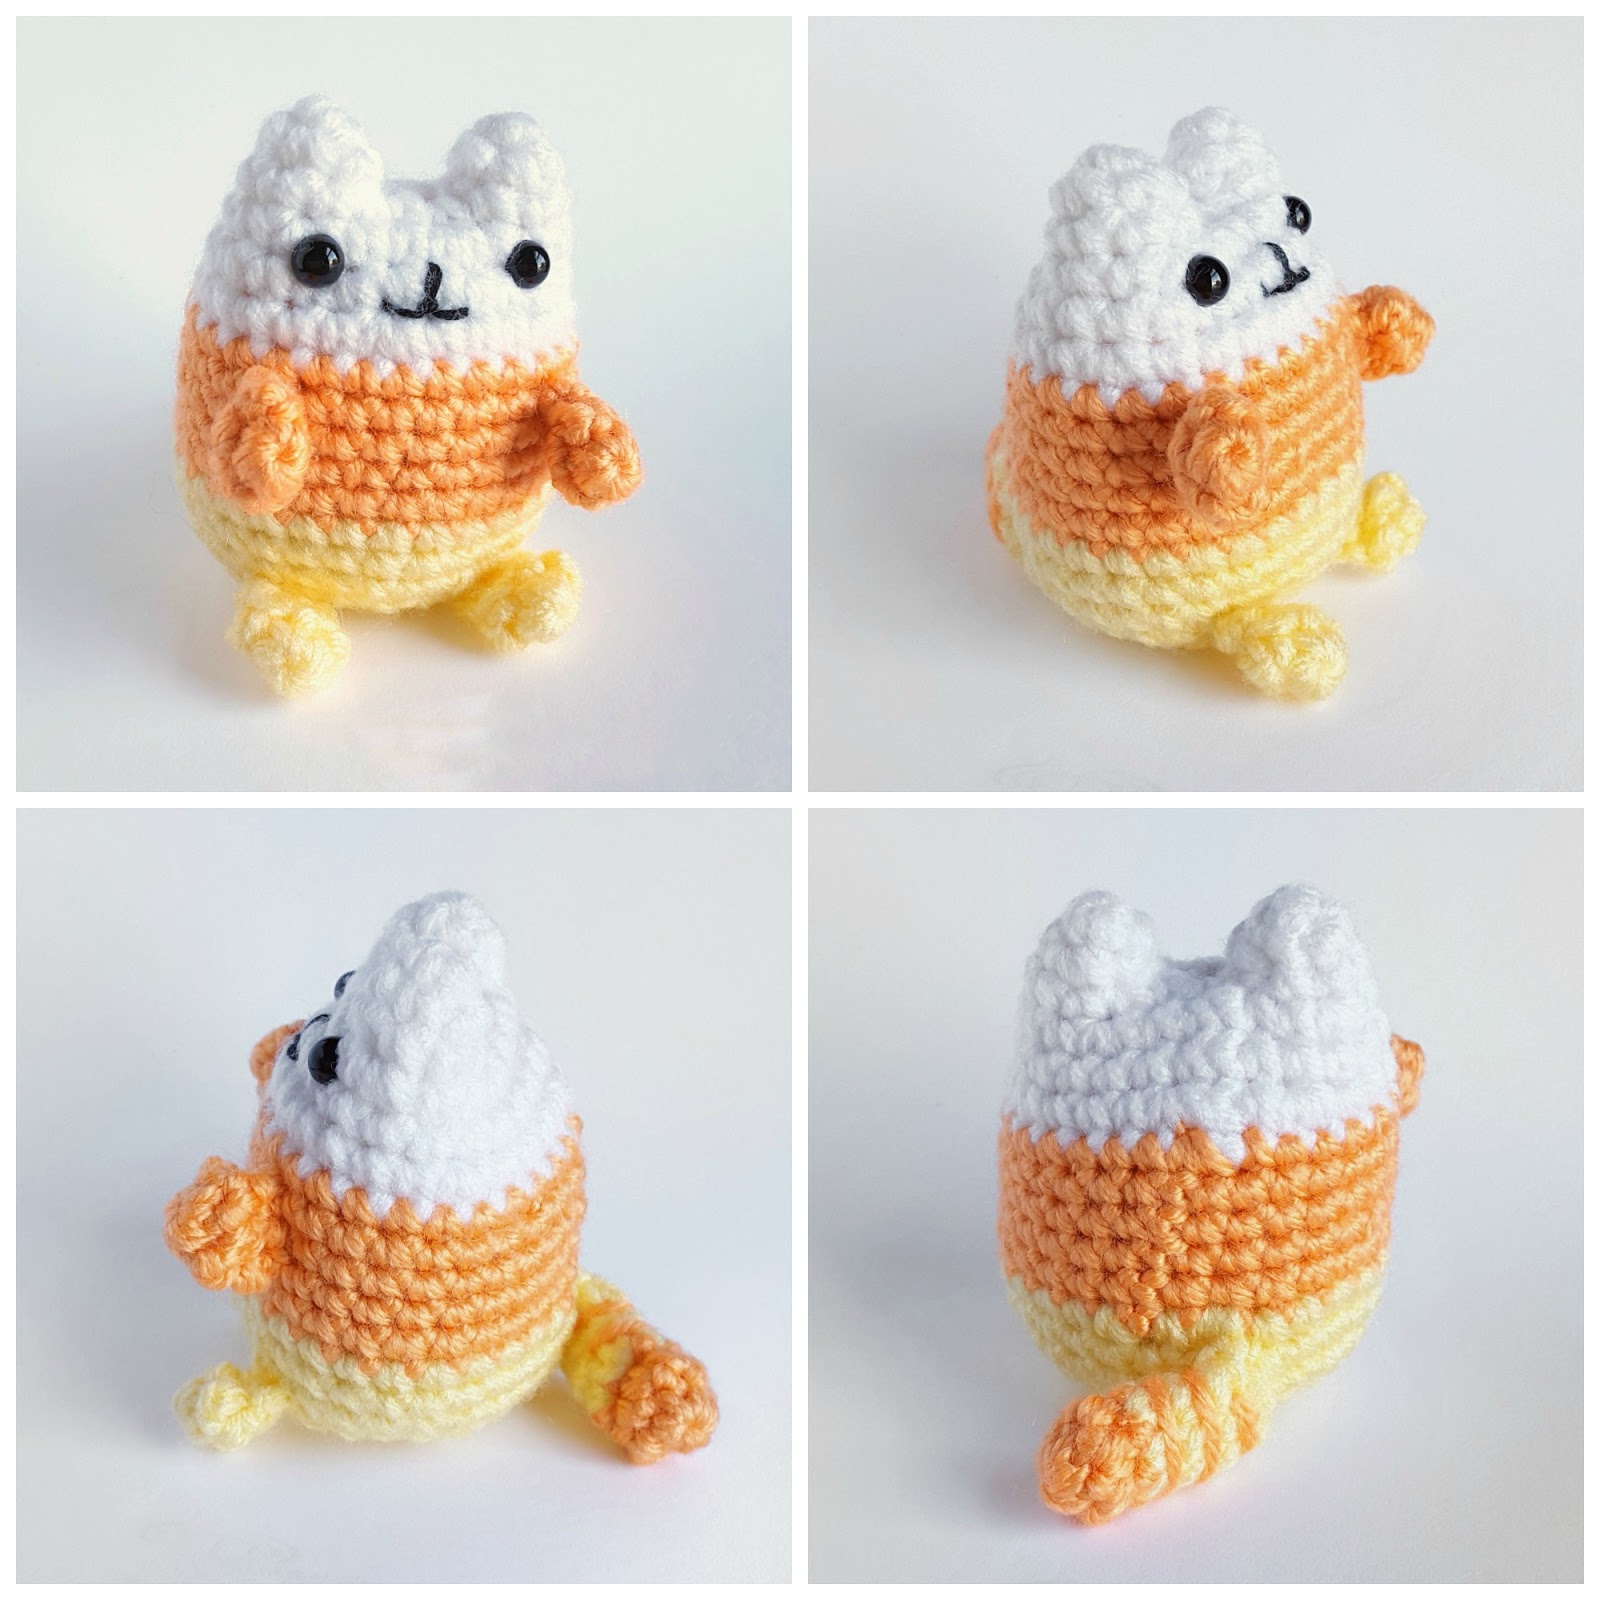
The pattern was a success so, as promised, here's the FREE pattern! This pattern took me about 2 hrs to create, a fast crocheter might only need an hour to make this sweetie! 


Crochet Candy Corn Pusheen Pattern

Difficulty: ❤❤♡♡ Advanced Beginner 

This is a wonderful beginner's project but it does use a few advanced techniques: The magic ring, invisible decrease and a slip stitch join of the two halves. Planet June has a wonderful tutorial of how to do the invisible decrease and the magic ring. 


Materials You'll Need:
• Worsted weight yarn - I used White, Yellow and Orange
• Crochet hook - Size E (3.5 mm)
• Embroidery thread - Black
• 2 - 6 mm safety eyes
• Key chain or lanyard
• Stuffing - Polyfil
• Yarn or Darning Needle
• Scissors

Stitch Pattern Key
Rnd - Round
MR - Magic Ring (magic circle, magic loop)
st - Stitch
ch - Chain
sc - Single Crochet
sl st - Slip Stitch
inc - Increase (two sc in one)
dec - Decrease (Invisible Decrease recommended)
[##] - Number of stitches in Round
( ) x 6 - Repeat action within ( ) 6 times


Notes: Finished Size: 2.5" x 2" (6 cm x 5 cm)  ❤  I use the joined-round method of amigurumi, most people do not.  This pattern works for both spiral and joined rounds, use the method you are most comfortable with. 


Candy Corn Pusheen
BODY
Starting at the top with her ears: Make 2, tie off EAR #1 but do not tie off EAR #2. 
Start with white yarn:
Rnd 1: In a MR, sc 4 [4] 
Rnd 2: (Inc then sc) x 2 [6]
Ch 2 and sl st EARS together, as shown below:
Rnd 3: Sc in each st [16]
Rnd 4: (sc 2 then inc) x 5, sc in last st. [21]
Rnd 5: Sc in each st [21] 
Rnd 6: (Inc then sc 3) x 5, inc in last st [27]
Insert two 6 mm eyes between Rnds 4 & 5, 6 holes apart. 

Switch to Orange yarn:
Rnds 7 - 11: (5 Rnds) Sc in each st [27]

Switch to Yellow yarn:
Rnds 12 -14: (3 Rnds) Sc in each st [27]
Stitch on a mouth with black embroidery thread. Also, gently stretch out the orange band to make the body look round and full. 
Rnd 15: (sc 3 then dec) x 5, sc in last 2 sts [22]
Rnd 16: (dec then sc 2) x 5, dec the last 2 sts together [16]
Start stuffing the body.
Rnd 17: Dec around eight times. Finish stuffing and tie off hole. The body should sit up-right. 
The Finished Body:

FEET - Make 4: 2 Orange, 2 Yellow
Rnd 1: In a MR, sc 5 [5]
Rnd 2: Sc in each st [5]
Fold foot in half and sc 2 times, with both halves together, across the top to close the piece as shown: 
Sew the orange FEET onto Rnds 8-10. Sew the yellow FEET onto Rnds 14-15. 
TAIL
Start with Orange yarn:
Rnd 1: In a MR, sc 6 [6]
Rnd 2: Sc in each st [6]
Tie off and leave a tail for sewing orange stripes on the yellow part of the tail. 

Switch to Yellow yarn:
Rnd 3-5: (3 Rnds) Sc in each st [6]
Fold tail in half and sc 3 times, with both halves together, across the top to close the piece as shown above for the feet. With the extra orange yarn tail, sew a few stripes on the yellow part of tail as shown below. 
Sew tail onto the lower back side of Pusheen's body, like in this picture:
You can stop there or add a key chain and take your cute little Pusheen with you wherever you go! My little helper loves her, I bet any kid or kid-at-heart would!

That's it, friends! I hope you enjoyed this mini pattern and tutorial! If you loved this design and would like to see more of my work and support Ami Amore, please visit my Etsy shop! You can also find my designs on Ravelry and Amigurumipatterns.net. 

Want to stay in the loop on new designs and promotions? Follow me on Instagram or Facebook! 

If you have any questions, send me an email and I'll do my best to reply quickly. Also, if you comment below, your comment won't appear until it's approved. This blog receives a lot of spam and I do my best to keep Ami Amore clean and happy :)


Until next time,



8.21.2017

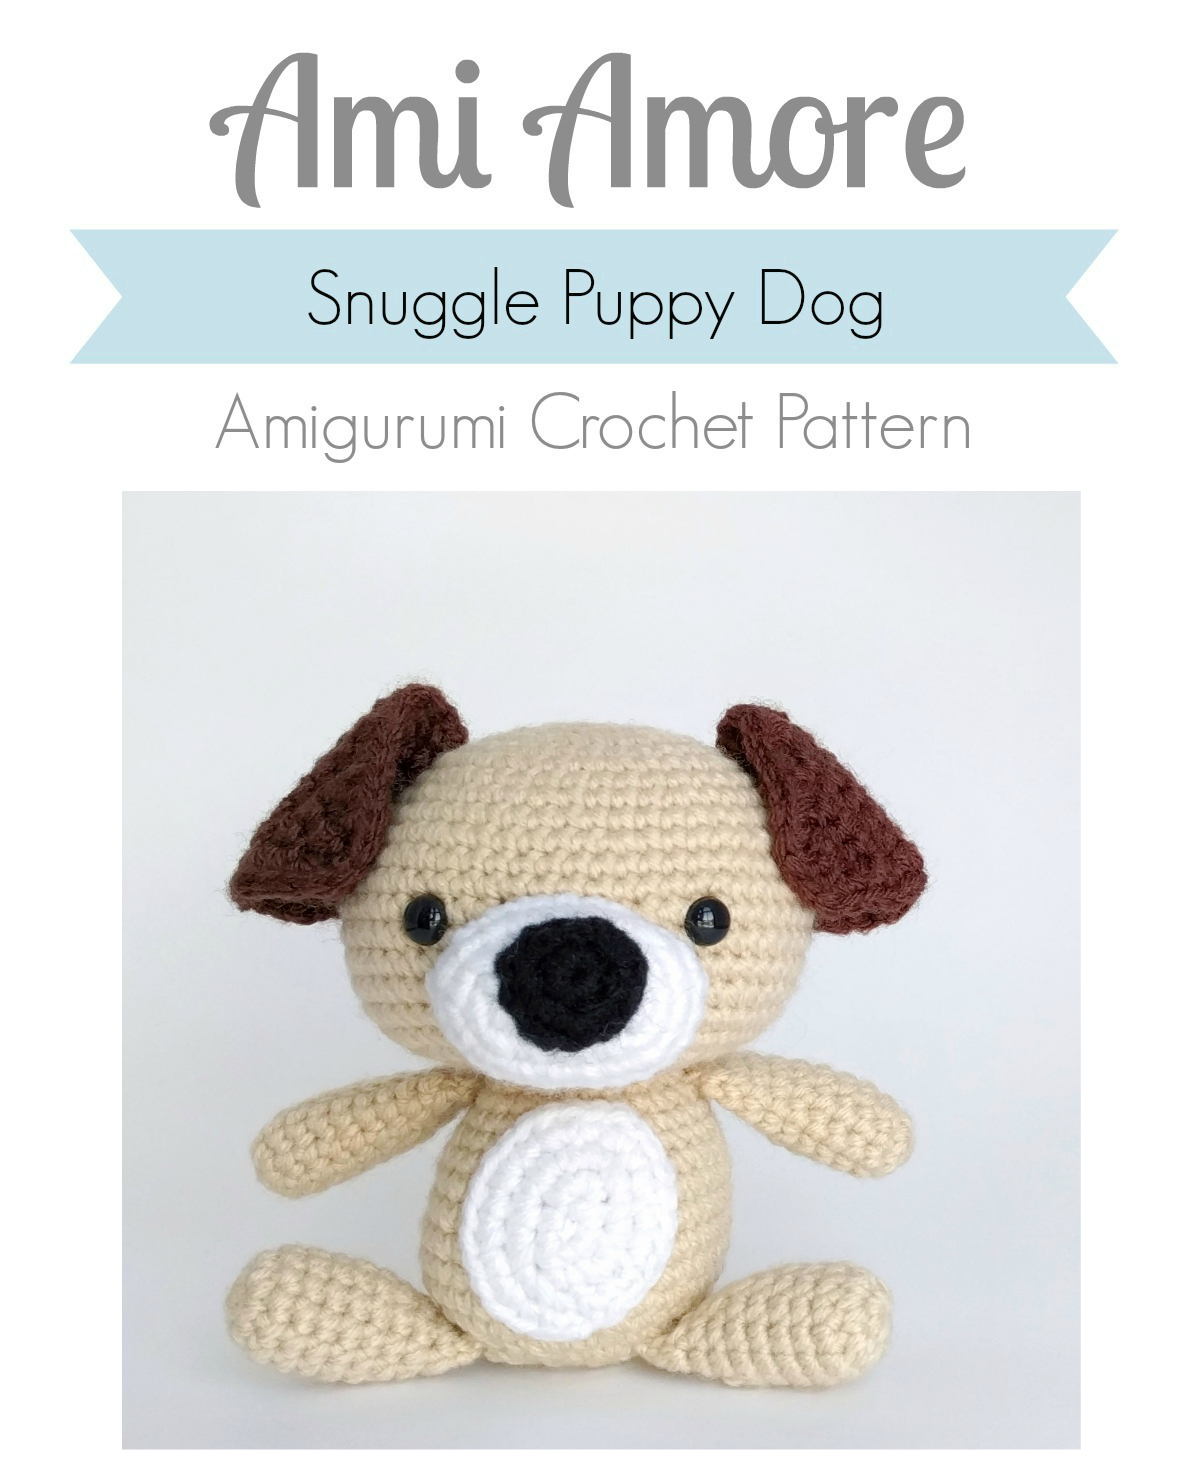
Snuggle Puppy Pattern


Hey Everyone!

I am very excited to share my latest pattern with you! Meet the Snuggle Puppy! He's cute, cuddly, he's perfect for babies and children. The pattern is great for beginners, it has a difficulty rating of EASY! Standing, the finished toy is about 6 inches, with sitting height is about 4.5 inches. From start to finish, the pattern will take about 3-5 hours to complete, but that does depend on your skill level and crocheting speed. The pattern is detailed and professional; it's a seven page tutorial filled with clear process pics, and instructions!

His every side is just so adorable! I'm in love with this little guy! My two-year-old son loves carrying him around and taking him with to nap time~

Want to make your own little pup? Visit one of my pattern shops to get your pattern and start your cutie today!

Etsy: https://www.etsy.com/listing/544050658/tutorial-pattern-crochet-puppy-dog?ref=shop_home_active_2
AmigurumiPatterns.net: http://www.amigurumipatterns.net/shop/AmiAmore/
Ravelry: http://www.ravelry.com/patterns/library/snuggle-puppy-dog

Share a picture of your finished to with me! Go to Instagram and post your puppy with the hashtag #snugglepuppypattern so I can find your work!

Have a great week guys!


7.24.2014

An Update

Hello Friends!  How are you all doing?  Well, I hope :)

I know this update is a long time coming. I don't have any really good excuses but I hope "buying a new home" is one that will suffice :D  And it's true too! My husband and I are currently in the process of closing on our first house! We're both super excited to experience and enjoy home-ownership, along with being very relieved that the house-hunt it over. 

It's been over 2 years since we started looking, but all the labor was fruitful and well worth the effort. We cannot take all or any credit as God's hand was clearly visible through everything from start to finish. We are extremely grateful! 

~

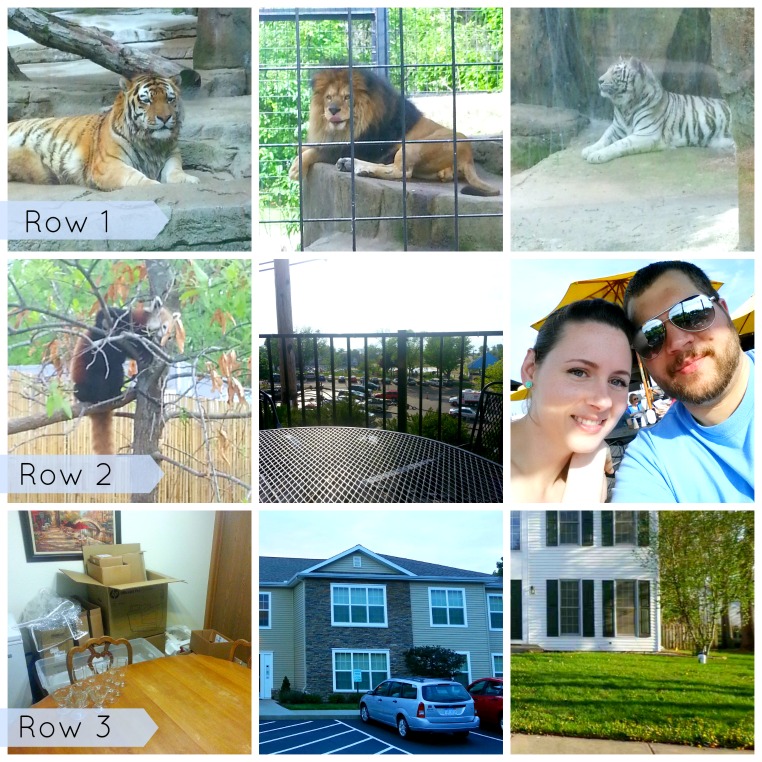
Here's a recap of my summer! 

Row 1:  For our anniversary in May we stayed in the local area on a short "stay-cation" in order to save up for our down payment! We planned a couple trips to local tourist-y spots like: a fancy dinner out, a day along Lake Michigan, and another day at the local zoo. Our zoo is a bit small but had many types of animals!

Row 2: Square 1- You really can't see him well, but that's a Red Panda in the tree! He was so cute and a lot smaller than I imagined them to be! Square 2 - Our day along the lake was wonderful! We went through a few shops, ate dinner at an open-top restaurant/grill (the food was amazing!), bought ice cream and chocolate candies at the South Bend Chocolate Company Cafe', and soaked in the sun! Also, it was Memorial Day and there were people everywhere! Street performers, musicians, food vendors, families, dogs on leashes (I seriously NEED a pet!! The cravings are so strong! Soon, sooon...), loud music, and an endless stream of teenagers!  Square 3 - Me and my handsome hubs :)

Row 3: Once we got our accepted offer and the closing date was set, we got packing! Cue unpreventable mess and chaos...  Goodbye apartment, hello new home! Well, we haven't closed yet, but we are trusting it will be soon!

~

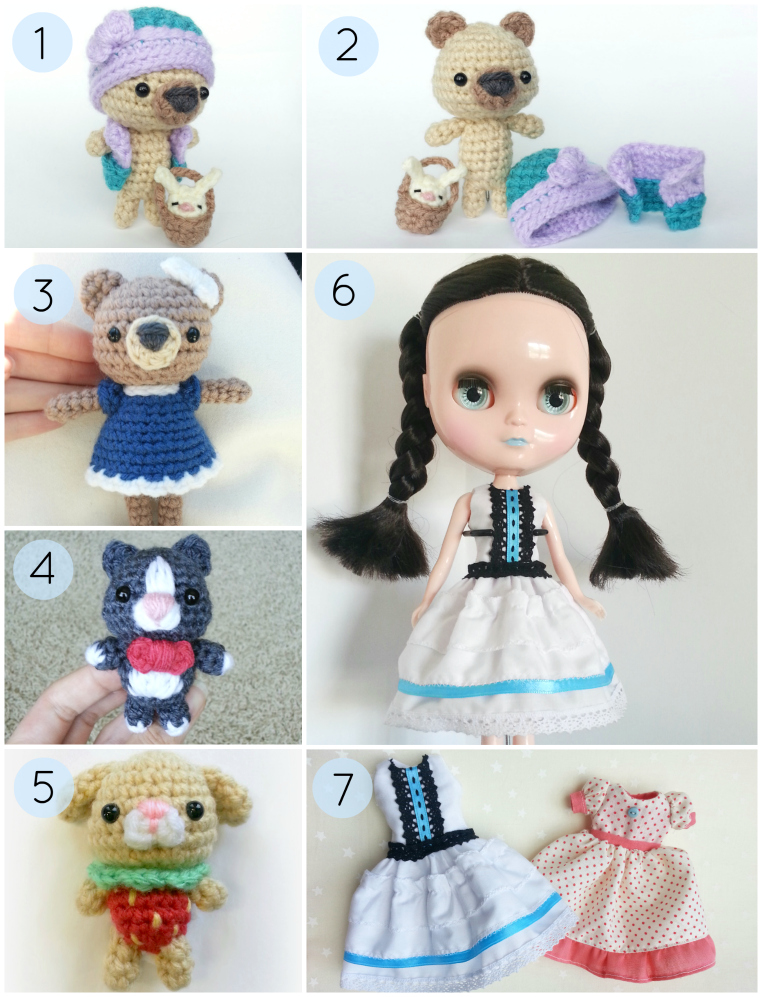
Amid the fervent house hunting, then waiting, then packing; I did make a few new ami's, mostly gifts. 

1 & 2: A custom order for a friend who gifted it to her friend :D She's a happy bear with a vest and hat, who loves to take her bunny friend on walks in her basket! 

3: A bear doll I've talked about before; I finally finished her! I loved how she turned out, so cute! She was a gift for my baby niece. 

4: Tuxedo Cat, a birthday gift for a sweet friend. 

5: Strawberry Bunny, a birthday gift for my little sister. 

6 & 7: I've been eyeing Blythe dolls for a long time and really wanted to customize one and sew sweet little dresses for her! So, after much research, I bought an Icy Doll and a very cheap Blythe fake. So far, I've carved the fake doll, and made a few outfits for the Icy. The fake Blythe's body is horrible and I plan to replace it with a Pure Neemo small body, if the carving turns out well. I really like the quality of the Icy. Her hair is soft and silky, her body is sturdy and an even color, and her eye chips are in great shape! I don't like her mouth so I plan to carve it into something more appealing :) Here's hoping I'm good at it! So far, so good with carving the fake...

With all my crafty stuff boxed away, I'm spending most of my free time picking out paint colors, decorating styles, making plans for diy's and renovations, gardens, dreams... So excited! 

How has your summer been? Any new and excited events, plans, or surprises? 


2.03.2014

7 Free Amigurumi Patterns for Valentine's Day!

With Valentine's Day barely ten days away, it's time to get out your crochet supplies and start a cute Valentine's project for your special someone! 

I've compiled my favorite 8 free amigurumi patterns for this holiday season! Click on the photos to take you to their pages. 


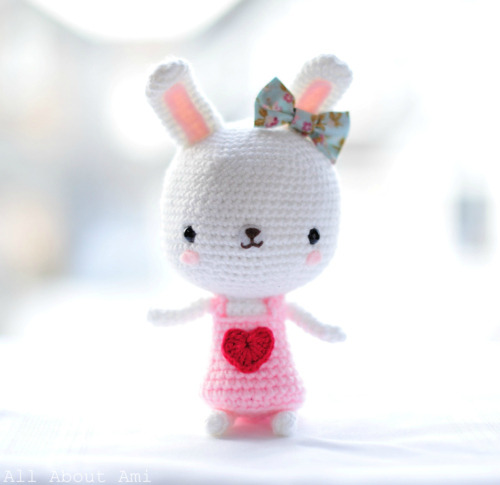
1: Sweet Heart Bunny
Stephanie, from All About Ami, designs the sweetest amigurumi on the internet, and each pattern is free! How awesome is that?! I love her patterns and tutorials, each one is clear with lots of pictures and step-by-step instructions. Two of her patterns are for Valentine's Day and this first one is my favorite! 


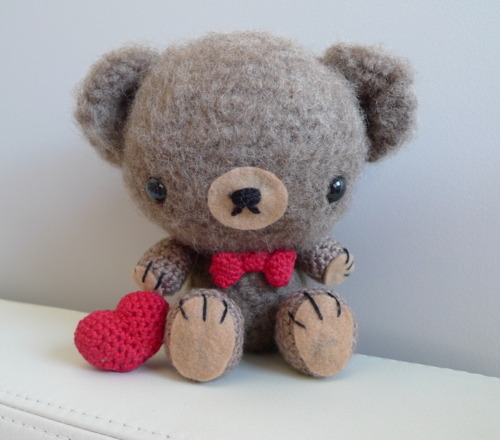
The second pattern by Stephanie, a teddy bear. Like the bunny, his pattern is super clear to follow. He's so adorable!! I love his little bow-tie and his irresistible fuzziness! 


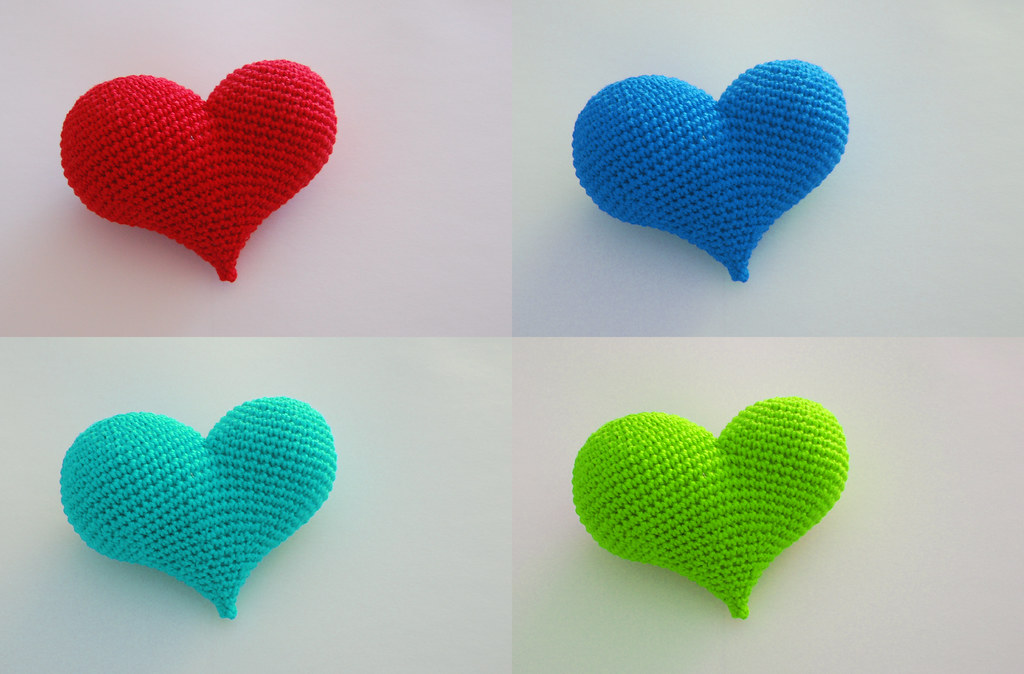
Diana, from MyGurumi, wrote this adorable puffy heart anyone can make! It's size is quite large, about 4" when finished! 


Valentine's Day isn't complete without a couple of strawberries, preferably dipped in chocolate!  This is a great pattern by TheSunandTheTurtle! Check out their site, you'll love all the cute patterns! 


How cute are these little birds snuggled in a nest?! Such a precious pattern by Yellow, Pink, and Sparkly!


Valentine's Day never passes without a batch of heart shaped cookies! A sweet pattern by Crochet N Play! Check out her blog, she has many adorable patterns designed for children! 


The perfect size for keychains or ornaments, this tutorial is great for the beginner and expert alike! The hearts are easy and quick, so make one for all your friends! Pattern by moi :)

Happy Valentine's Day!!

1.16.2014

Amigurumi Chick Pattern & Rilakkuma Pattern Mods

Happy New Year Friends!!

Don't you just love the fresh feeling of a new year?  It's like a blank slate covered in hope, ready for the pen of your heart to write all manner of plans and dreams!  I don't know about you but plans are hard for me to make and keep, as I am more of a dreamer and as such, my plans continually change!

One of the dreams I've had for a while, but haven't succeeded in producing a solid plan, is to start a series of free amigurumi patterns and modifications for your favorite kawaii characters!  By pattern modifications, I'm talking about a few simple changes to an amigurumi pattern you purchased in one of my shops.
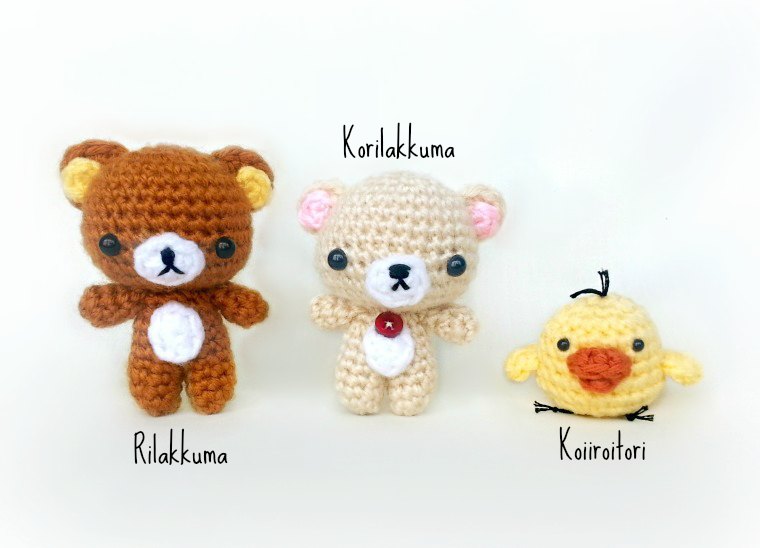
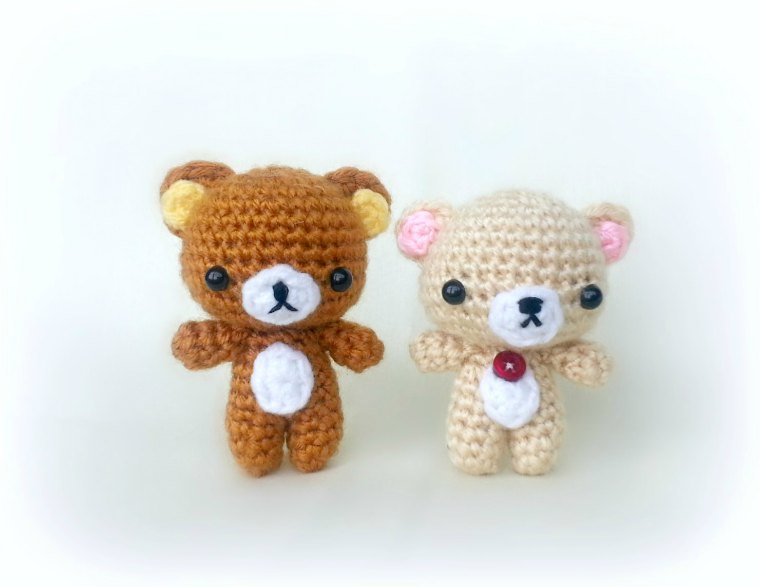
Rilakkuma, Korilakkuma and Kiiroitori


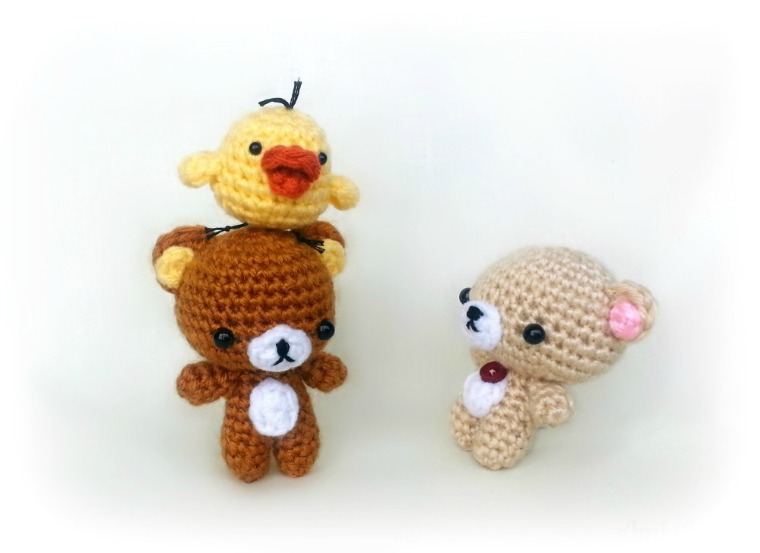
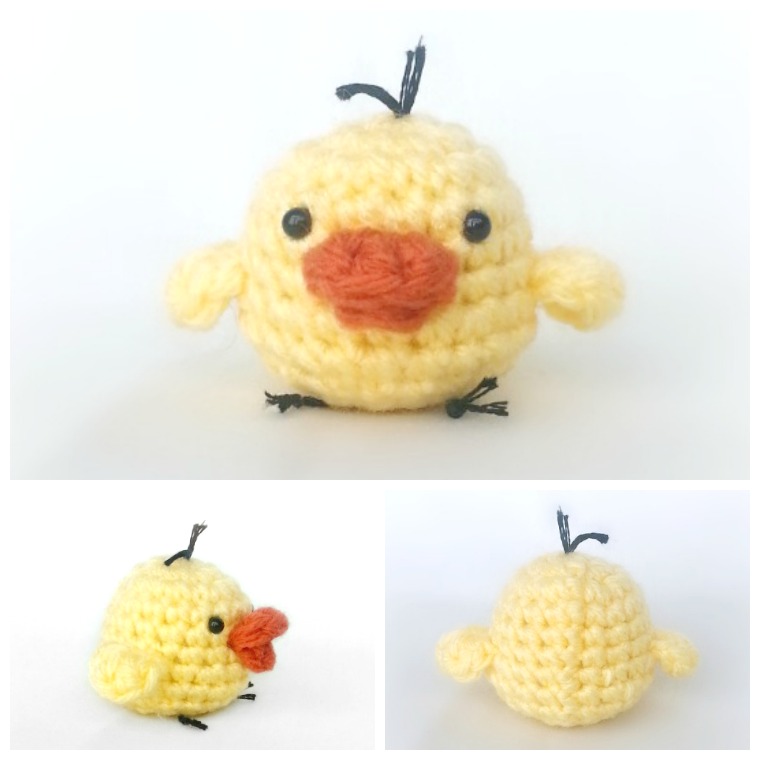
The first pattern mods I'd like to start this series with are for Rilakkuma and Korilakkuma and a free amigurumi pattern for Kiiroitori!  To make Rilakkuma as shown here, you are going to need to follow my Cutie Bear Pattern. If you haven't heard of Rilakkuma or his friends, let me introduce you!
Rilakkuma, Korilakkuma and Kiiroitori
Rilakkuma is a character produced by the Japanese company San-X. His name is a combination of the word relax and the Japanese word for bear. As his name implies, Rilakkuma loves to relax and be very lazy. He enjoys laying around, sleeping, watching TV, soaking in hot springs and listening to music.

His friend Korilakkuma is is a younger, smaller bear hence "Ko" which means child in Japanese. She is an energetic and mischievous friend who enjoys playing tricks on Rilakkuma while he is sleeping, like drawing on him and sewing odd colored patches to his clothes!

Kiiroitori is a chick who lives with both the bears. He is a sensible and very mature bird, often scolding Rilakkuma for being too lazy and Korilakkuma for being too naughty. He's the opposite of Rilakkuma with his hard working nature and love of cleanliness.

Cutie Pattern Modifications


Bear Amigurumi Pattern
Cutie Pattern Link
The pattern used for both bears is the Cutie Bear pattern, available HERE.

Both bear's body and head patterns are close to the same as the Cutie Bear pattern. The only difference is Rilakkuma's body has one extra round of single crochets, between Rnds 6 & 7. This is to make Rilakkuma taller than Korilakkuma. You can see the height difference one round makes!
rilakkuma and korilakkuma

The pattern for the "Belly and Nose" is as follows, make two:

Belly and Nose
In a MR, sc 1, hdc 2, sc 2, hdc 2, sc 1. Sl st to close. [8 sts total]
Pull the ring closed tightly, cut leaving a long tail for sewing. Sew the first one to the body. Use black embroidery thread to sew a small nose and mouth on the second one. Sew on to the Head in the same fashion as the Belly.

The pattern for the "Inner Ears" is really simple, but this one feature is so defining for Rilakkuma, he's just a regular bear without them!

Inner Ears
In a MR, sc 4 times. 
Make 2. Pull ring tightly closed and cut a long tail. Sew the Inner Ears onto the Outer Ears and Head, before or after the Ears are attached - which ever way is simpler for you!

Kiiroitori's Free Amigurumi Pattern
Kiiroitori free amigurumi pattern
Difficulty: ❤♡♡♡ Beginner 

Materials You'll Need:
• A small amount of yarn, I used Impeccable Loops & Threads in Yellow and Orange
• Crochet hook - D to F depends on yarn weight
• Stuffing - Polyfil
• Yarn or Darning Needle
• Scissors

• 2 - 4 mm safety eyes

Stitch Pattern Key
Rnd - Round
MR - Magic Ring (magic circle, magic loop)
st - Stitch
ch - Chain
sc - Single Crochet
dc - Double Crochet
hdc - Half-double Crochet
Sl st - Slip Stitch
inc - Increase (two sc in one)
dec - Decrease (Invisible Decrease recommended)
[##] - Number of stitches in Round
( ) x 6 - Repeat action within ( ) 6 times

Notes: Finished Size: 1.5" x 1.5" (3.5 cm x 4.5 cm)  ❤  I use the joined-round method of amigurumi, most people do not.  This pattern works for both spiral and joined rounds, use the method you are most comfortable with. 

Kiiroitori
BODY
Rnd 1: In a MR, sc 6 [6]
Rnd 2: (inc in each st) x 6 [12]
Rnd 3: (inc then sc 1) x 6 [18]
Rnd 4-6: sc in each st [18]
Rnd 7: (sc 3 then Inc) x 4, sc in last 2 sts [22]
Rnd 8: Sc in each st [22]
Rnd 9: (sc 2, then dec) x 5, sc in last 2 sts [17]
Place 4 mm eyes 4 holes apart, between Rnds 4&5
Rnd 10: (dec then sc 1) x 5, dec last 2 sts together [11]
Stuff firmly.
Rnd 11: Dec around, sc in last st. [6]
Tie off, finish stuffing, and close hole.

WINGS
Rnd 1: in a MR: sc, hdc, dc 2, hdc, sc, sl st. [7]
Pull ring closed, cut thread leaving a long tail. Make 2 and sew to opposite sides of body.

BEAKS
Top Beak (larger sized)
In a MR:  sc, dc 3, sc. Sl st, Tie off.

Bottom Beak
In a MR, sc 3, sl st and tie off.

Sew top on first, between eyes. Sew bottom on next, as close as you can, underneath the top beak. With black thread, add hair, legs, and nostrils . And you've finished Kiiroitori! 


I hope you enjoy his little pattern and the modifications to making your own Rilakkuma set! I know I did :) If you have any questions, please let me know in the comments below or send me an email and I'll do my best to reply quickly. Remember, your comment won't appear until it's approved. This blog receives a lot of spam comments and I do my best to keep Ami Amore clean and happy :)

Thanks for stopping by!  Enjoy~


As this is an original Ami Amore pattern, kindly do not claim it as your own. You may place a link to this pattern from your site, but please do not repost it onto your page. Share a picture of your own Rilakkuma set with everyone on Facebook, we'd love to see your finished work!

8.29.2013

Celebrating With Free Cupcakes! {Amigurumi Tutorial}


Exactly one year ago, I published my very first post with much excitement and trepidation! Honestly, I never thought Ami Amore would grow so much, so quickly! Blogging is harder than I originally thought it would be but it's so worth the time and effort it takes! I've met so many great people through this experience and I look forward to another wonderful year! Thank you all for your support! 
To celebrate, I made everyone cupcakes! Well, a cupcake pattern and tutorial anyway! This pattern is fun and simple, perfect for beginners. Cupcakes are a great way to celebrate almost any occasion!  
With a little inspiration and a lot of imagination, the variations that you could come up with using this tutorial are limitless! Add pearly beads, french knots, or straight stitches, all will look like different sprinkles. Add a pair of safety eyes and a little mouth and you'll have a cutie cupcake! Aww! 
Amigurumi Cupcake Pattern Tutorial

Difficulty: ❤♡♡♡ Beginner 
This is a wonderful beginner's project as it does not contain any difficult techniques. The magic ring is probably the only tricky point but is easily and quickly mastered. Planet June has a wonderful tutorial of how to do the magic ring. 

Materials You'll Need:
• Yarn in your choice of colors
• Crochet hook - D to F depends on yarn weight
• Stuffing - Polyfil
• Yarn or Darning Needle
• Scissors
❤ Optional - embroidery thread, beads, 5 mm safety eyes, keychain, or phone lanyard.

Crochet Terms:
This pattern is written in American terms, but for those unfamiliar with them, the British terms are in blue.


American                               (UK/British)
MR - Magic Ring                      (magic ring)
sl st- Slip Stitch                      (Slip Stitch)
ch - Chain                              (chain) 
sc - Single Crochet                  (dc- double crochet)
invdec - Inv. Decrease             (inv. decrease)
inc - increase                          (inc - increase)
hdc - half double crochet          (htr - half treble)

Notes: Finished Size: 1.25" x 1.5" (3.5 cm x 4.5 cm)  ❤  I use the joined-round method of amigurumi, most people do not.  This pattern is written for both spiral and joined rounds, use the method you are most comfortable with. 

WRITTEN PATTERN - The abbreviated pattern is at the end of this post if you'd like to work on it alone. It's a very simple pattern, feel free to jump to the end! 

Let's go!!


The Cupcake Bottom
Left: Rnd 1) In a MR, single crochet 6 times. Pull your ring tightly closed. This is important so it doesn't work it's way loose, leaving a hole in the bottom of your work.

Right: Rnd 2) Increase in each stitch, you should have 12 stitches at the end. 
 Left: Rnd 3) Single crochet in the back loop of every stitch. Your stitches will naturally curve inwards, creating a sharp turn and a flat bottom. Another 12 stitches at the end.

Right: Rnd 4) Single crochet in 2 stitches then increase in the next stitch. Repeat this pattern around 3 more times. You should have 16 stitches at the end of this round. 

Left: Rnd 5) Single crochet in each stitch. Tie off and hide your tail inside the bottom. 

Right: Finished Bottom! Note how crocheting in the back loops created a 90 degree turn, giving the cupcake a nice flat base to sit on! 

The Frosted Top

Left: Rnd 1) Choose a nice frosting color and in a magic ring, single crochet 6 times. Again, pull your right tightly closed. 

Right: Rnd 2)  Increase in each stitch, you should have 12 stitches at the end.  Rnd 3) Single crochet in the first stitch then increase in the next. Repeat this pattern around 5 more times for a total of 18 stitches. Rnds 4 & 5) For the next two rounds, single crochet in each stitch to the end, with 18 stitches in each round. 


Left: Rnd 6) To add the scalloped frosting edge: chain 1, in next stitch, half double crochet 1 stitch, chain 1 and slip stitch in the next stitch. Repeat around the bottom, about 8 more times. Tie off and leave a long tail for sewing the top to the cupcake bottom. 

Right: Edging Step-by-Step:  (Step 1) If you are using the joined rounds method, simply begin with 1 chain. For those using the spiral rounds method, close your piece with a slip stitch then chain 1. 
Left: (Step 2) In the next stitch, make a half double crochet. (Step 3) Chain 1.

Right: (Step 4) Slip stitch in the next stitch. Repeat these 4-steps around the edge to the end, about 8 more times. 
Left: The completed cupcake top! Remember to leave a long tail for sewing. 

Right: Thread your yarn needle with the tail, and insert it through the stitches on cupcake's bottom as shown. 
Left: Pull your needle through and push it from the inside - outward of the top as shown. Sewing this way will cause the top edge of the brown bottom to be hidden inside the red frosting's top creating a realistic cupcake! 

Right: As you sew, pull your thread tightly and evenly. This will prevent stuffing from coming out and create a sturdy, attractive finished piece. 
Left: With only about an inch wide opening left, stop and stuff your cupcake. I used a pair of scissors to push my Polyfil inside. 

Right: Sew your opening closed and hide the tail inside the cupcake. Cut the string and ...
You're Done!! 


WRITTEN PATTERN 

American                               (UK/British)
MR - Magic Ring                      (magic ring)
sl st- Slip Stitch                      (Slip Stitch)
ch - Chain                              (chain) 
sc - Single Crochet                  (dc- double crochet)
invdec - Inv. Decrease             (inv. decrease)
inc - increase                          (inc - increase)
hdc - half double crochet          (htr - half treble)

Amigurumi Cupcake Pattern 

Cupcake Bottom:
Rnd 1- In a MR, sc 6 [6]
Rnd 2- Inc in each st [12]
Rnd 3- sc in each st, back loops only [12]
Rnd 4- (sc 2 then inc) x4 [16]
Rnd 5- sc in each st [16]
❤ Tie off and hide the end inside the bottom.

Frosted Top:
Rnd 1- In a MR 6 [6]
Rnd 2- Inc in each st [12]
Rnd 3- (sc then inc) x6 [18]
Rnd 4&5- sc in each st [18]
Rnd 6- Edging: Ch 1, hdc in next st, ch 1, sl st in next st. Repeat around, about 8 more times. 
❤Tie off and leave a long tail for sewing the frosting top to the cupcake bottom. Sew the bottom under the frosting's top edge to that the brown top edge isn't visible. Stuff when there's about an inch wide opening left. Finish sewing the cupcake closed. Hide the tail inside the cupcake and you're done! 
The finished cupcake is quite small. Add a key chain or phone lanyard and take your handiwork with you or gift it to a friend for their birthday! Also, since Christmas is coming soon, make a whole bunch in your favorite colors and designs, add ornament hooks, and hang them on your mini Christmas tree! Have fun!

Thank you for a great year of blogging! 


If you enjoyed this tutorial and found it useful, please subscribe to my blog or subscribe on BlogLovin'. Thank you!! 

As this is an original Ami Amore pattern, kindly do not claim it as your own. You may place a link to this pattern from your site, but please do not repost it onto your page. Remember to share a picture of your own amigurumi heart!