8.29.2013

Celebrating With Free Cupcakes! {Amigurumi Tutorial}


Exactly one year ago, I published my very first post with much excitement and trepidation! Honestly, I never thought Ami Amore would grow so much, so quickly! Blogging is harder than I originally thought it would be but it's so worth the time and effort it takes! I've met so many great people through this experience and I look forward to another wonderful year! Thank you all for your support! 
To celebrate, I made everyone cupcakes! Well, a cupcake pattern and tutorial anyway! This pattern is fun and simple, perfect for beginners. Cupcakes are a great way to celebrate almost any occasion!  
With a little inspiration and a lot of imagination, the variations that you could come up with using this tutorial are limitless! Add pearly beads, french knots, or straight stitches, all will look like different sprinkles. Add a pair of safety eyes and a little mouth and you'll have a cutie cupcake! Aww! 
Amigurumi Cupcake Pattern Tutorial

Difficulty:  Beginner 
This is a wonderful beginner's project as it does not contain any difficult techniques. The magic ring is probably the only tricky point but is easily and quickly mastered. Planet June has a wonderful tutorial of how to do the magic ring

Materials You'll Need:
• Yarn in your choice of colors
• Crochet hook - D to F depends on yarn weight
• Stuffing - Polyfil
 Yarn or Darning Needle
• Scissors
 Optional - embroidery thread, beads, 5 mm safety eyes, keychain, or phone lanyard.

Crochet Terms:
This pattern is written in American terms, but for those unfamiliar with them, the British terms are in blue.


American                               (UK/British)
MR - Magic Ring                      (magic ring)
sl st- Slip Stitch                      (Slip Stitch)
ch - Chain                              (chain) 
sc - Single Crochet                  (dc- double crochet)
invdec - Inv. Decrease             (inv. decrease)
inc - increase                          (inc - increase)
hdc - half double crochet          (htr - half treble)

Notes: Finished Size: 1.25" x 1.5" (3.5 cm x 4.5 cm)  ❤  I use the joined-round method of amigurumi, most people do not.  This pattern is written for both spiral and joined rounds, use the method you are most comfortable with. 

WRITTEN PATTERN - The abbreviated pattern is at the end of this post if you'd like to work on it alone. It's a very simple pattern, feel free to jump to the end! 

Let's go!!


The Cupcake Bottom
Left: Rnd 1) In a MR, single crochet 6 times. Pull your ring tightly closed. This is important so it doesn't work it's way loose, leaving a hole in the bottom of your work.

Right: Rnd 2) Increase in each stitch, you should have 12 stitches at the end. 
 Left: Rnd 3) Single crochet in the back loop of every stitch. Your stitches will naturally curve inwards, creating a sharp turn and a flat bottom. Another 12 stitches at the end.

Right: Rnd 4) Single crochet in 2 stitches then increase in the next stitch. Repeat this pattern around 3 more times. You should have 16 stitches at the end of this round. 

Left: Rnd 5) Single crochet in each stitch. Tie off and hide your tail inside the bottom. 

Right: Finished Bottom! Note how crocheting in the back loops created a 90 degree turn, giving the cupcake a nice flat base to sit on! 

The Frosted Top

Left: Rnd 1) Choose a nice frosting color and in a magic ring, single crochet 6 times. Again, pull your right tightly closed. 

Right: Rnd 2)  Increase in each stitch, you should have 12 stitches at the end.  Rnd 3) Single crochet in the first stitch then increase in the next. Repeat this pattern around 5 more times for a total of 18 stitches. Rnds 4 & 5) For the next two rounds, single crochet in each stitch to the end, with 18 stitches in each round. 


Left: Rnd 6) To add the scalloped frosting edge: chain 1, in next stitch, half double crochet 1 stitch, chain 1 and slip stitch in the next stitch. Repeat around the bottom, about 8 more times. Tie off and leave a long tail for sewing the top to the cupcake bottom. 

Right: Edging Step-by-Step:  (Step 1) If you are using the joined rounds method, simply begin with 1 chain. For those using the spiral rounds method, close your piece with a slip stitch then chain 1. 
Left: (Step 2) In the next stitch, make a half double crochet. (Step 3) Chain 1.

Right: (Step 4) Slip stitch in the next stitch. Repeat these 4-steps around the edge to the end, about 8 more times. 
Left: The completed cupcake top! Remember to leave a long tail for sewing. 

Right: Thread your yarn needle with the tail, and insert it through the stitches on cupcake's bottom as shown. 
Left: Pull your needle through and push it from the inside - outward of the top as shown. Sewing this way will cause the top edge of the brown bottom to be hidden inside the red frosting's top creating a realistic cupcake! 

Right: As you sew, pull your thread tightly and evenly. This will prevent stuffing from coming out and create a sturdy, attractive finished piece. 
Left: With only about an inch wide opening left, stop and stuff your cupcake. I used a pair of scissors to push my Polyfil inside. 

Right: Sew your opening closed and hide the tail inside the cupcake. Cut the string and ...
You're Done!! 


WRITTEN PATTERN 

American                               (UK/British)
MR - Magic Ring                      (magic ring)
sl st- Slip Stitch                      (Slip Stitch)
ch - Chain                              (chain) 
sc - Single Crochet                  (dc- double crochet)
invdec - Inv. Decrease             (inv. decrease)
inc - increase                          (inc - increase)
hdc - half double crochet          (htr - half treble)

Amigurumi Cupcake Pattern 

Cupcake Bottom:
Rnd 1- In a MR, sc 6 [6]
Rnd 2- Inc in each st [12]
Rnd 3- sc in each st, back loops only [12]
Rnd 4- (sc 2 then inc) x4 [16]
Rnd 5- sc in each st [16]
Tie off and hide the end inside the bottom.

Frosted Top:
Rnd 1- In a MR 6 [6]
Rnd 2- Inc in each st [12]
Rnd 3- (sc then inc) x6 [18]
Rnd 4&5- sc in each st [18]
Rnd 6- Edging: Ch 1, hdc in next st, ch 1, sl st in next st. Repeat around, about 8 more times. 
Tie off and leave a long tail for sewing the frosting top to the cupcake bottom. Sew the bottom under the frosting's top edge to that the brown top edge isn't visible. Stuff when there's about an inch wide opening left. Finish sewing the cupcake closed. Hide the tail inside the cupcake and you're done! 
The finished cupcake is quite small. Add a key chain or phone lanyard and take your handiwork with you or gift it to a friend for their birthday! Also, since Christmas is coming soon, make a whole bunch in your favorite colors and designs, add ornament hooks, and hang them on your mini Christmas tree! Have fun!

Thank you for a great year of blogging! 


If you enjoyed this tutorial and found it useful, please subscribe to my blog or subscribe on BlogLovin'. Thank you!! 

As this is an original Ami Amore pattern, kindly do not claim it as your own. You may place a link to this pattern from your site, but please do not repost it onto your page. Remember to share a picture of your own amigurumi heart! 

8.13.2013

Amigurumi WIPs and Sewing Projects

(Caution! Word and Picture Heavy Post Ahead!)

Am I the only one who feels like this summer is going by too quickly? Wasn't yesterday the 4th of July?
It was a gorgeous day to pick blueberries! It was so cool that I needed my sweatshirt, at the end of July too! In total, my husband and I picked over 14 quarts of berries! Freezing them is the best option and I can't wait to break out a couple bags this winter! Blueberry cobbler anyone? 
Looking back over the last few weeks, I feel like I accomplished little but I know it can't be not true. Ever feel like that? I think it's because I haven't made many new designs for my shop. I did sell many narwhals and whales (yay!) whose pattern is now etched in my memory - permanently. I can't complain, they are simple to make and apparently really popular!

Aside from crafting, this summer has been eventful for my husband and I. Blueberry picking with family, hung out with friends, and prepared dinner with different family members at our apartment. My husband's brother and his wife recently had a baby girl, graduated from college, and moved home from WA; all within six weeks!  Definitely a big change and adjustment that has brought many busy moments for everyone. It's so wonderful to have them home! Their little girl is my very first niece and I'm smitten! She's so sweet and adorable! Yes, I've made her a few hats and no, I didn't take any pics. Shame on me too, because the hats turned out great! Ah well, I have many more that I'd like to make and I'll be sure to share about those :] 
The dressed-up amigurumi dolls that I have in my shop are selling well so I made two more, but I've hit the "Now what should they wear?" wall. Help! I need some inspiration and suggestions! 
The next project that I've been causally working on is this lovely bear.  I've tried to made larger, more doll-like ami's in the past but each one was a total flop. Not this one though! I'm so happy how she's been progressing! She does need a nose and mouth and once that's been perfected, I'm looking forward to making other animals based on this pattern. Also, I'd like to sell a pattern set of 3 to 4 different animals and their outfits. It'd be easier for me to write up a set of patterns than individual ones, I think. <-- Key phrase: I think. I have no idea if that's true!

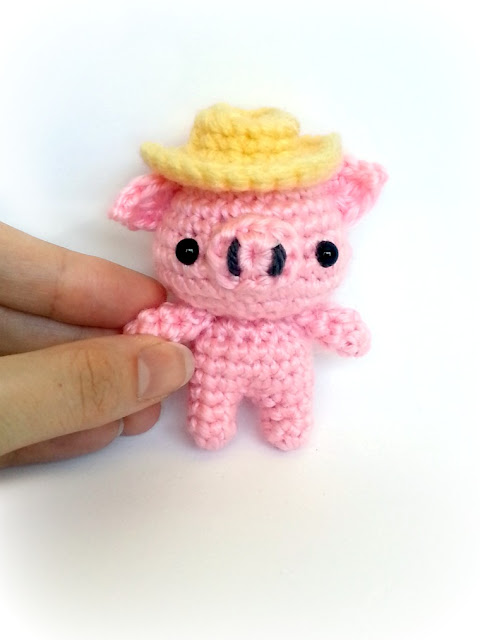
And now, an official Ami-Flop!  Meet Cowboy Pig! 
Yeeeah, not so cute.  I was trying to make a joined-leg body with some space between the legs but the body is way too short. Or his head is too small, not sure which. He's kinda cute, but I don't know, just not really "there"- if that makes any sense. Ah well :] Moving on...

Sometimes my hands wear out from crocheting or I get bored with my work so I dabble in other crafts that I find more interesting or calming.  At the moment I'm really enjoying sewing and embroidery. Up first: My blog binder. It all started with a desire to be a better blogger, which meant I needed to get serious about organizing my posts, ideas, and plans. I looked all over the internet for tips to organize my blog and there were tons of options from post outlines to planners, to printables. 
(Left) What started it all: The Post Outlines. The best one I found was this one at BridgettEdwards.com; I loved her helpful accompanying post too! Her form is the closest to what I wanted but I decided to create my own that would be best suited for my needs and style. I used Word to create them from a list of points I used most often when writing my posts. And of course they needed a holder, so a piece cardboard and three yards of washi tape later, I had a nifty envelope.

(Right) All my organizing-stuff needed to be kept together and I didn't want to use a plastic 3-ring binder. Yuck. Something soft with lots of room and pockets would be much better! I spent a whole Saturday sewing this thing together and it's one of my better sewing creations. If I could go back, I would use a different fabric for the front, this pattern is pretty in small doses but the whole cover is too over powering and the embroidery can hardly be seen.
(Top) I love the inside! You can't see them but the beige fabric has little white stars all over it! There's a large pocket on both sides, with another pocket on the left - you can't see it, it's under the Post Outline's envelope. 

(Bottom) Filling my binder was easy. I found the perfect journal at Target for $10. The cover is a soft faux-leather in the prettiest blue! It's been super handy for planning my life, posts, and projects. The TOPS comp book was also from Target for $.50- great deal and I wish I had bought more than one! It contains my filled out Post Outlines, writing tips and ideas, and patterns. The Sharpie pens were also from Target for $1.50 and come in many colors. 

All in all, I love my binder but regret the cover fabric choice. But it's handy, sturdy, and travels well; what more could I ask for? 

Second Sewing Project: A Needle Book
I love Japanese crafts, (amigurumi is just one of them) and the Japanese Kawaii & Zakka style. Amy, from NanaCompany, has perfected this style down to an art form.  Her pieces inspire me to become a better designer! I love her work! If you've never heard or seen her work, do check out her beautiful blog!  

It was her lovely tutorial I used to create this needle book. The embroidery is my own design.
The book was a serene and relaxing project where I could let my mind wonder and just enjoy the process. 
Every time I open it to take a needle, the clouds, balloons, and happy colors make me smile :]

I hope everyone's enjoying their summer! What projects are you working on or have completed? 


7.18.2013

Bonnie, the Cutie Bunny

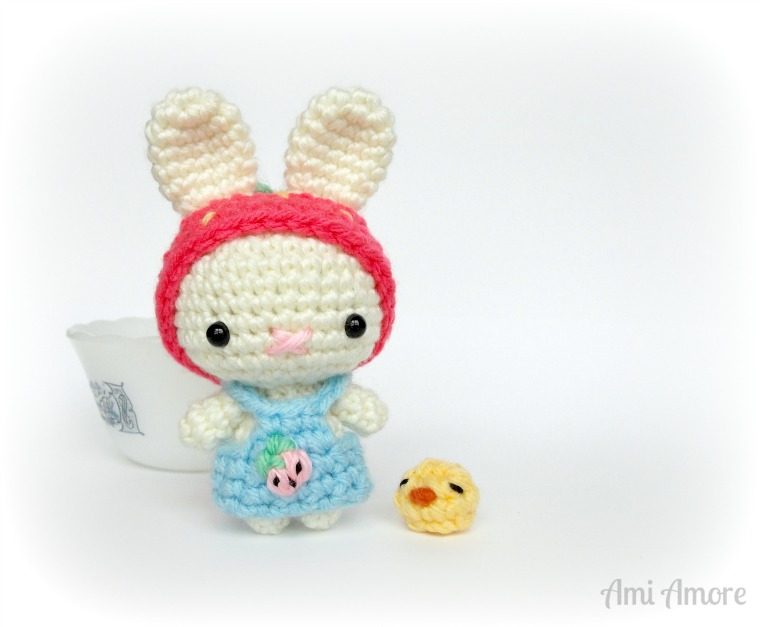
Bonnie is the newest member of the Cutie Collection. She loves to pick strawberries on warm, summer days (who doesn't!), and you will almost always see with Chickie, her friendly baby bird.
Chickie - "Peeep! Peep, peep!",  Bonnie - "Oh? What's that?"

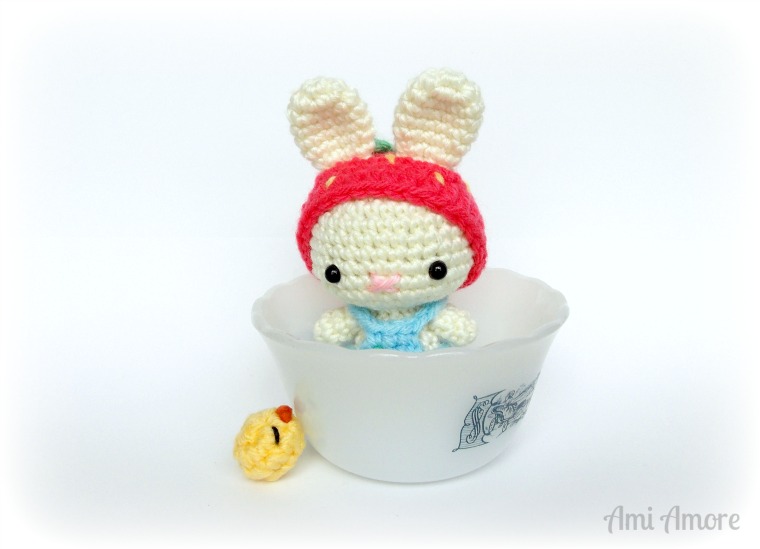
Chickie - "Look out behind you! An evil cat hides in that bowl!"

Bonnie - "In here? I don't see any cat. Are you sure? I think I'll climb in just to make sure.",  Chickie - "Nooo!" 
Bonnie - "Ha! See? No cat in here!", Chickie - whispering, "It might still be in there, it can turn invisible!" 

 ~ ~ ~ ~ ~ ~ ~ 

Bonnie is a bit smaller than the other Cuties, as she's made from Martha Stewart's Extra Soft Wool Blend yarn which is a lighter weight than the regular acrylic yarn I use. The animal designs I have done so far are: the bear, puppykitty, and bunny. My plan is to have each pattern for sale so you can make the Cutie of your choice! The Cutie Kitty Pattern is done and I'm currently working on the bear pattern. In the meantime, I'd like to remake the bunny but give her lop ears, she'd be so adorable with long, droopy ears! 

I had lop-eared bunnies once...I grew up on a small vegetable farm in southern Michigan. We never had any farm animals, only pet barn cats and a dog. During our mid-to-late teens, my sister and I finally wore my dad down to the point where he allowed us to get a few animals if we promised to care for them ourselves. He didn't want to be stuck doing all the work. My sister raised 7 well-loved chickens from eggs we hatched ourselves, and I bought a pair of Mini Lop rabbits. 

The female was a sweet tempered, gray rabbit named Lady, and the male was a white and cream, grumpy fellow named Buck. Wanting to expand my brood to keep up with my sister, I bred them and Lady had 5 tiny little bunnies! As you probably know, bunnies grow up very quickly and it wasn't long before I had the whole group out in the grass hopping around! A few times, one or two of the bunnies would hop too far away (I didn't want to loose them!), so I'd reach out and snatch them up. They would be so startled by this that they'd squeal/squeak and scream! The first time it happened, it startled me! I had no idea they made that noise, sounds like a loud rat! Ha ha! They were so cute! 

Even though they were lops, their ears stood up straight like a normal rabbit but once they were older, their ears gradually fell downwards, like their parent's. When they were old enough, I sold them to families, I didn't have room to keep them all. I miss my bunnies, they were a fun and easy pet to have. I kept all of mine outside so I don't know how they are in the house but they are pretty stinky, just to warn you! :]  So many good memories~

Growing up, did you have a favorite pet or animal? Any other farm-girls out there? What's your favorite animal memory?


7.08.2013

Amigurumi Heart Tutorial


This quick and fun heart tutorial is a good starting point for anyone wishing to move beyond designing amigurumi plush that are mix of ball and tube shapes. The slip stitch join is a very useful technique that has many possibilities besides hearts :] Here are some ideas for it's use: straight legs for dolls and animals, fingers for hands, bunny or monster ears, plant branches . . . 

Difficulty: Beginner 
This is a wonderful beginner's project but it does use a few advanced techniques: The magic ring, invisible decrease and a slip stitch join of the two halves. Planet June has a wonderful tutorial of how to do the invisible decrease and the magic ring

Materials You'll Need:
• Yarn in your choice of color(s)
Crochet hook - D to F depends on yarn weight
Stuffing - Polyfil
 Yarn or Darning Needle
Scissors
*Optional - keychain, phone lanyard, pin back, necklace chain, ornament hook

Crochet Terms:
This pattern is written in American terms. But for my UK friends, the British terms are in blue.

American                             (UK/British)
MR - Magic Ring                     (magic ring)
sl st- Slip Stitch                     (Slip Stitch)
ch - Chain                             (chain) 
     sc - Single Crochet            (dc- double crochet)
  dec - Inv. Decrease            (inv. decrease)

WRITTEN PATTERN - The abbreviated pattern is at the end of this post if you'd like to work on it alone. It's a very simple pattern, feel free to jump to the end! 

Notes: Finished Size: 1.75" x 1.75" (4.5 cm x 4.5 cm) I use the joined-rounds method of amigurumi, most people do not, use the method you are most comfortable with. 

Ready? Here we go!
LEFT: Rnd 1: In a magic ring, single crochet 6 times. Pull your ring tightly closed. This is important so it doesn't work it's way loose, leaving a hole at the top of your work. 

RIGHT: Rnd 2: Single crochet in first stitch, increase in the next. Repeat this pattern around the circle 2 more times. You should have 9 stitches at the end.  Rnd 3: Single crochet in each stitch. You should have nine (9) stitches again. Tie off, and weave in the end to get it out of your way. Repeat Rnd 1, 2, & 3 to produce the other half heart "lobe". Do not tie off or cut the yarn.
LEFT: With the second "lobe" still on your hook, take your first "lobe" and insert your hook through one stitch. Yarn over. 

RIGHT: Pull the yarn through the stitch and the loop on your hook. You just made a slip stitch to join the two halves. That was easy!
LEFT: Here's the tricky part: Rnd 4: Single crochet in each stitch around both halves - 9 stitches each, with a total of 18 single crochet stitches around. Be sure to count, it's easy to miss the tight stitches in-between where the two halves are joined. 

RIGHT: Rnd 5: Single crochet into each stitch around, another 18 stitches. 
LEFT: Rnd 6: Single crochet in first 2 stitches then invisible decrease the next two stitches together. Repeat this pattern around 3 more times. Single crochet in the last 2 stitches. There should be a total of 14 stitches when done.  As you can see, the heart's shape is very visible now, though up-side down.

RIGHT: Rnd 7: Start this round with an invisible decrease, then single crochet in next stitch. Repeat pattern around 3 more times, invisible decrease the last two stitches together. The total stitch count is 9. 
LEFT: Take out your hook and start stuffing your heart. Start with small pieces of stuffing, I use Polyfil, on one side. After that side is done, move to the second lobe.

RIGHT: Lastly, stuff the center of the heart. Make sure to stuff it firmly as this improves the heart's shape and creates a more pleasing look at the end. A little might be sticking out but that's ok. 
Center: Rnd 8: Work invisible decreases around, 4 in total. Single crochet in the last remaining stitch, for a total of 5 stitches. 
LEFT: Finishing off - The tying off of this heart is important because it gives the appearance of a sharp point at it's bottom. Cut a medium length tail and thread your needle. Pass your needle through the front loops of the 5 stitches -toward the center- like you are doing a whip stitch. 

RIGHT: Pull tight and your opening should close tightly shut. Hide your yarn tail inside the body of the heart.  This is also a useful method of tying off any closed amigurumi project as it makes the final piece much neater. PlanetJune has a step by step tutorial if this isn't clear here. 
Annndd... You're done! 

WRITTEN PATTERN 


American                              (UK/British)
MR - Magic Ring                     (magic ring)
sl st- Slip Stitch                     (Slip Stitch)
ch - Chain                             (chain) 
sc - Single Crochet                 (dc- double crochet)
dec - Inv. Decrease            (inv. decrease)

Amigurumi Heart Pattern
Rnd 1: In a MR, sc 6 [6]
Rnd 2: (Sc then inc) x3 [9]
Rnd 3: Sc in each st [9]
Make 2 lobes, tie off first one. Do not tie off second lobe! Sl st both halves together.
Rnd 4&5: Sc in each st [18]
Rnd 6: (Sc 2 then dec) x4, sc in last 2 sts [14]
Rnd 7: (dec then sc) x4, dec last 2 sts together [9]
Stuff both lobs and center off heart firmly
Rnd 8: (dec around) x4, sc in last st (5)
Tie off and you're done!
The finished heart is quite tiny, making it the perfect size for gifts and decor! Add a keychain, phone charm lanyard, brooch or pin-back, or turn them into ornaments. String them on a piece of yarn or ribbon as an adorable garland! Have fun! Most importantly, make one for someone you love~

I'd love to see your finished work! Send me your picture or post it to Ami Amore's Fan Page on Facebook! If you enjoyed this tutorial and found it useful, please subscribe to my blog or subscribe on BlogLovin'

Enjoy!


As this is an original Ami Amore pattern, kindly do not claim it as your own. You may place a link to this pattern from your site, but please do not repost it onto your page. Remember to share a picture of your own amigurumi heart! 

6.28.2013

Ami Amore's New Look

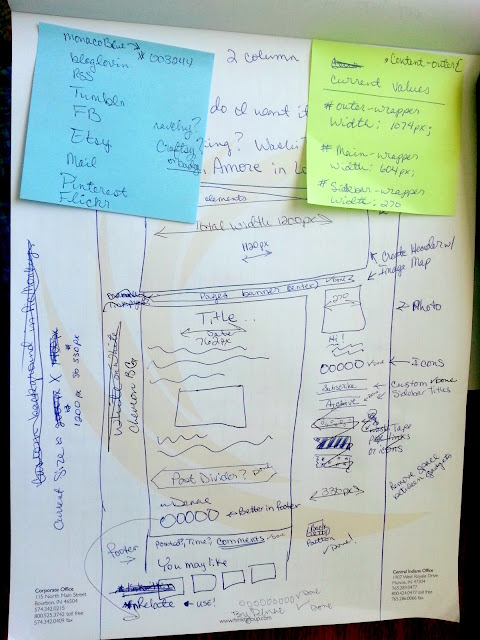
Some of you probably noticed that I've been MIA for awhile. I've been devoting many free hours creating this new blog design! The hours weren't wasted because it didn't turn out half bad! Actually, it's way better than what I was envisioning :D Here's how it all started:

I'm sure changes will come but that is one of the big reasons I wanted a new template and to build it myself. I can't and won't take all the credit though, Carrie from carrieloves.com, helped me with the Pages Ribbon and gave me a few tips and tricks that proved to be extremely helpful. I couldn't have done it without her help! Thank you so much Carrie! 

When I first started up my blog, I used a cute free template I found online and it worked great as a start-up platform for Ami Amore. Over time I did discover quite a few code errors that proved to be frustrating and the design was very limited in what could be changed. Example: the post's comment links on the Home page didn't even show up. Readers had to click each title to be able to leave a comment. Also, I was unable to change any of the fonts or their properties to customize the template to suit my whims of fancy. 

Here's how it used to look. Cute, right? Thank you, Mr. Biyan Pasau for the good design! May your skills continue to grow, I appreciated your hard work!

And here's the new: I guess I have a thing for gray. . . 
This is a two column layout that's been expanded about 300px wider than the standard Blogger template. Doing so created much needed space in the post body area and allowed for a wider sidebar. So far, I love the space and haven't run into any problems viewing my blog on a phone or tablet which are much smaller than the large computer screen I used for designing at home.


Tidbits about the design:
Blogger's "Simple" template is the base the new design is built on. 

I designed the header, the Pages ribbon, along with the sidebar ribbons to match, all on PicMonkey! It was a little tricky at first but once I got the hang of what shapes and sizes different areas required, it went smoothly. 

Chevrons are popular everywhere it seems and blog backgrounds are no exception. I originally wasn't going to use chevrons but when I tried one on for size, it looked perfect! I found this one at tinysea.net. I did lighten it a bit, I wanted a background that would be easy on the reader's eyes. 

The social media icons were designed by Carrie, the lady who helped me. She posted free icons in 30 different colors! If you don't have any on your site, you should garb a set of hers! They look and work great!

The other widgets I either found online or signed up for and added them to my layout. The "Followers" widget has been discontinued by Google to make way for Google+. I don't use G+ and my "Followers" gadget was great so I found a work around. All widgets are listed in the template's HTML code, so after digging through the old template, I copied the Followers gadget's code and pasted it into the new template. Worked like a charm! 

If you'd like to build your own template or add new widgets and such, start by doing lots of research. Google your questions, you're not the first person to ask them! There are many, many great resources and tutorials for blog design. When it comes to code, practice is the best advice I can give. Practice and a browser add-on called Web Developer to help you learn to identify the coding on your site as well as other sites. 

After this experience, I've really come to admire web designers! It's hard work programming a button to work the way you need it to. It's like a complicated puzzle that's all one color. But when it's finished and works, you feel like jumping up and down! I know I did, several times! :D

I hope you enjoy the new look! Let me know if you run into any bugs! 


6.20.2013

Ami Amore is on BlogLovin!

<a href="http://www.bloglovin.com/blog/4523173/?claim=wxug9j7v4y8">Follow my blog with Bloglovin</a>

Ami Amore is now on BlogLovin!! Yay!! http://www.bloglovin.com/blog/4523173  <--- click link to follow!


6.19.2013

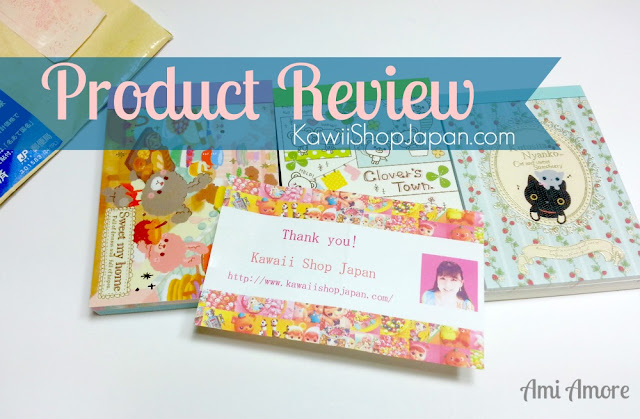
Product Love: Mini Memo Pads


A Review of KawaiiShopJapan

I don't remember when or how I caught the kawaii bug, but I am in love with cute-kawaii characters! Some of my favorites are Sabo Kappa, Toromi, Molang, Crux's bears and bunnies, etc... I dream of owning a cute character stationery set that includes: a diary/scheduler to organize my time and activities in, sticky note/tabs, regular and mini memo sheets for extra notes or pages. Oh, and stickers: I'd like to use lots of stickers and washi tape for pretty pops of color! 

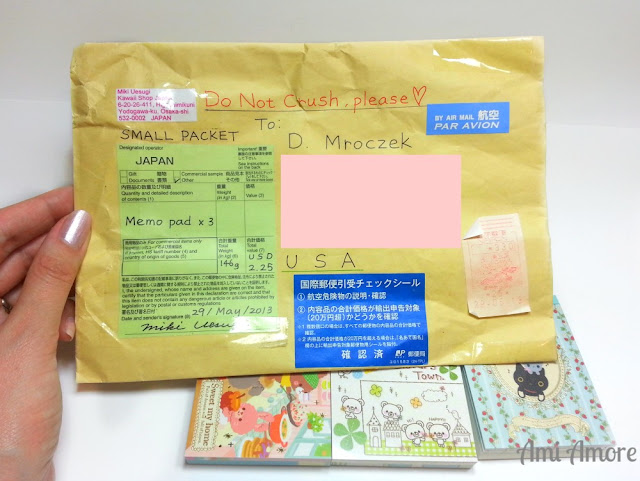
In my online searches for my dream stationery set, I came across an intriguing little store: KawaiiShopJapan.com. Miki, the shop owner in Japan, was a kind and informative seller; after I placed my order, she kept me up to date on it's progress. Miki even went so far as taking a photo of my package when she mailed it! Oh, and the best part: shipping only cost me $3.50 and took 4 days! That's going from Japan to MI, USA in FOUR days! Incredible!!

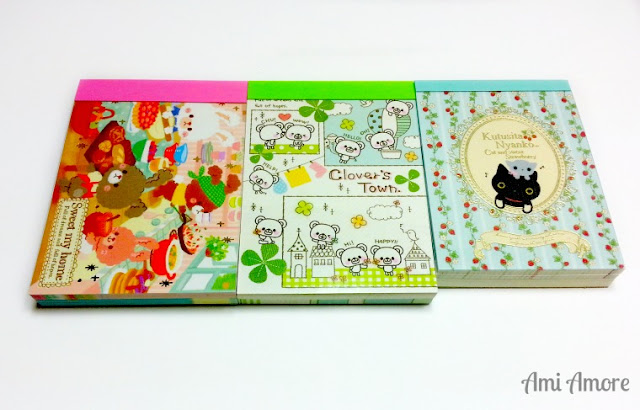
Here's what I bought:  San-x Kutusita Nyanko mini memo pad - $1.70
I love the color blue and strawberries so picking this one was a no-brainer for me :D
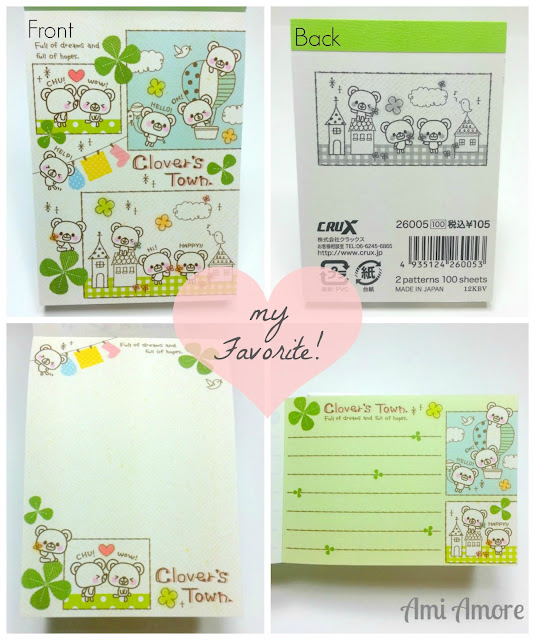
Crux Clover's Town mini memo pad - $1.85
My favorite because of the sweet little bears! I want to design an amigurumi after them!
Crux Sweet My Home mini memo pad - $1.85

The Crux pads were 3.5 x 2.5 inches, while the San-x pad was .25 inches smaller, :( bummer, but oh well. Their quality easily makes up for such a minor detail. I love each pad! I want to use them but can't bring myself to writing on one! They are so adorable!

 Miki packaged all three in bubble wrap and they arrived in perfect condition! 
KawaiiShopJapan offers great prices and super fast shipping, but being a small shop, it does lack variety.  I just wish there were large memo pads and loose sheets to choose from so I can buy more from one shop. Overall, I'm very happy with my purchase, definitely will be ordering again in the future!

Check out her store, I'm sure there's at least one item you'll fall in love with!


Do you collect any kawaii character stationery/items? If so, where did you find yours? Do you have a favorite shop or site you'd like to recommend?